Search by Drawing a Shape
Refresh the Web App.
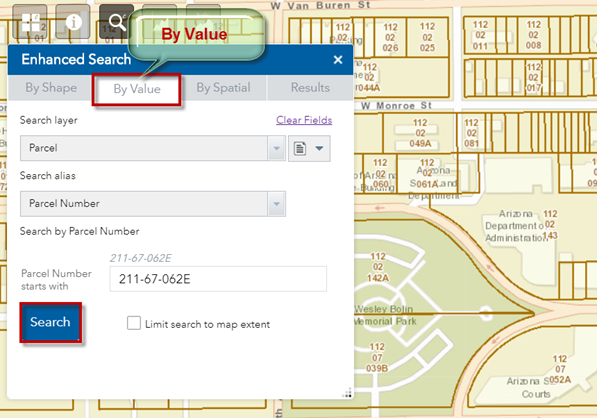
The default search method is By Value when the Web App initializes.
Click on the Search button.
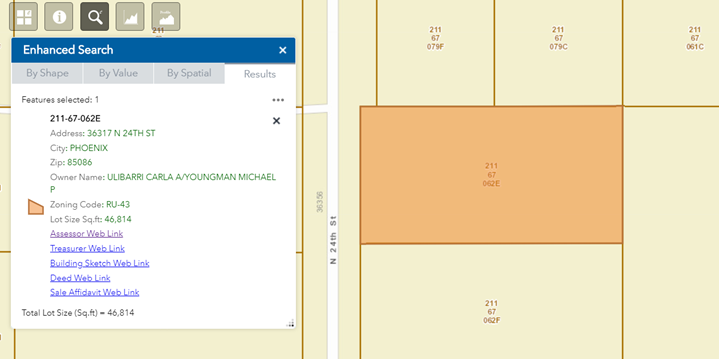
The map zooms to Parcel Number 211-67-062E.
Zoom out a few steps so that you can view the neighboring parcels.
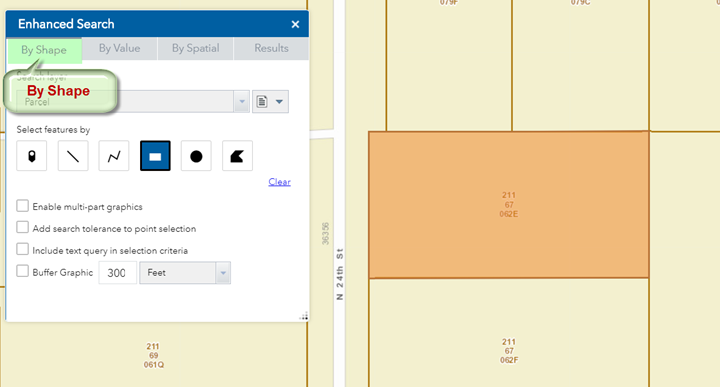
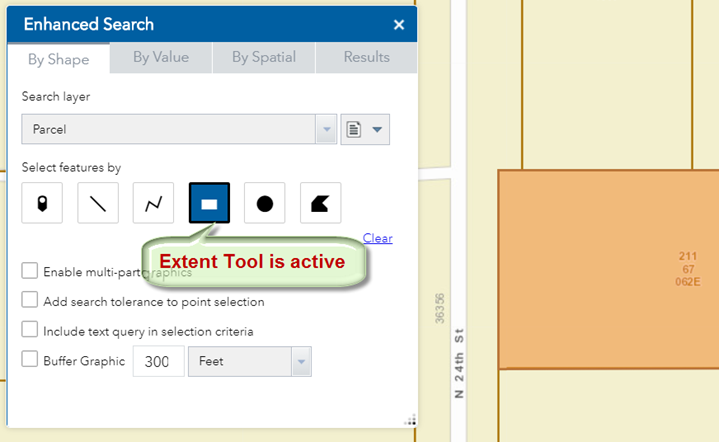
Open the By Shape Tab.
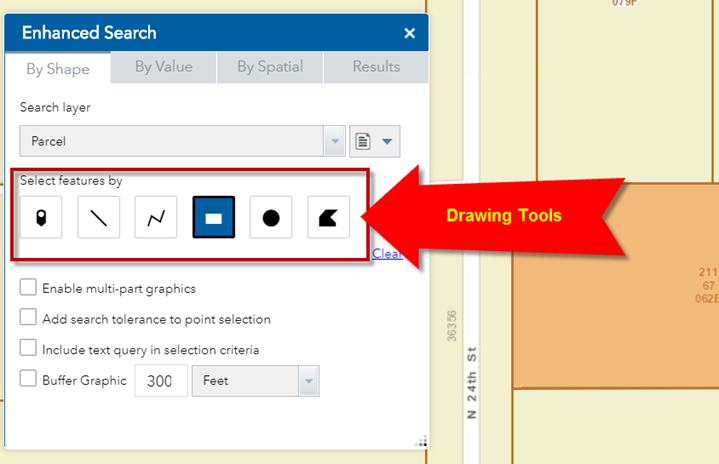
You can select features by using any of the six drawing tools.
The Extent Tool is active by default. This lets you draw a rectangle on the map.
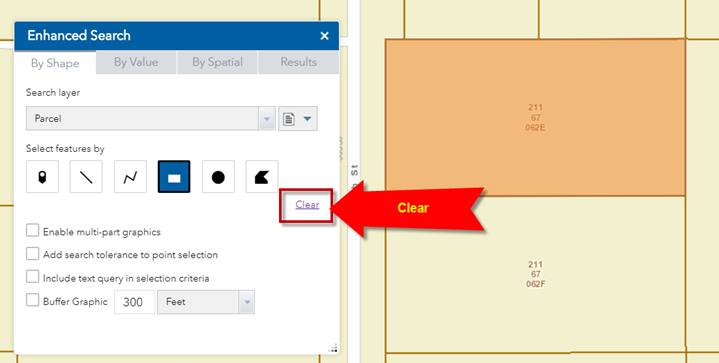
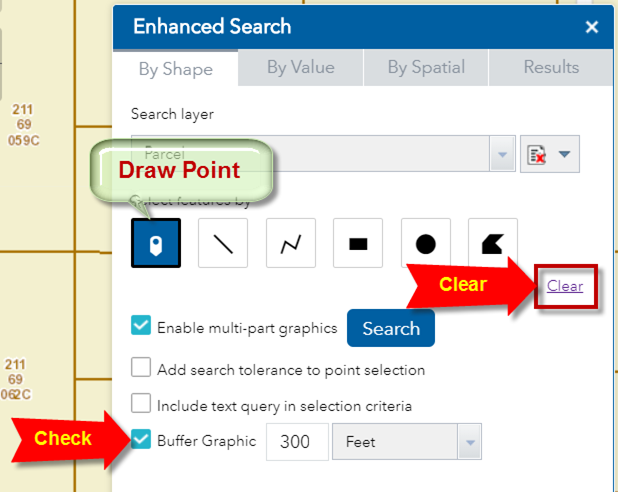
Press Clear to clear the current selection.
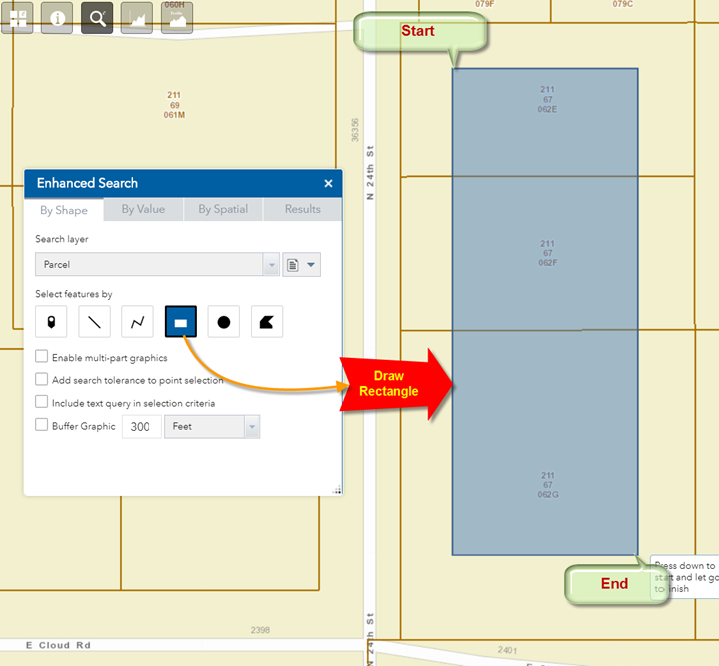
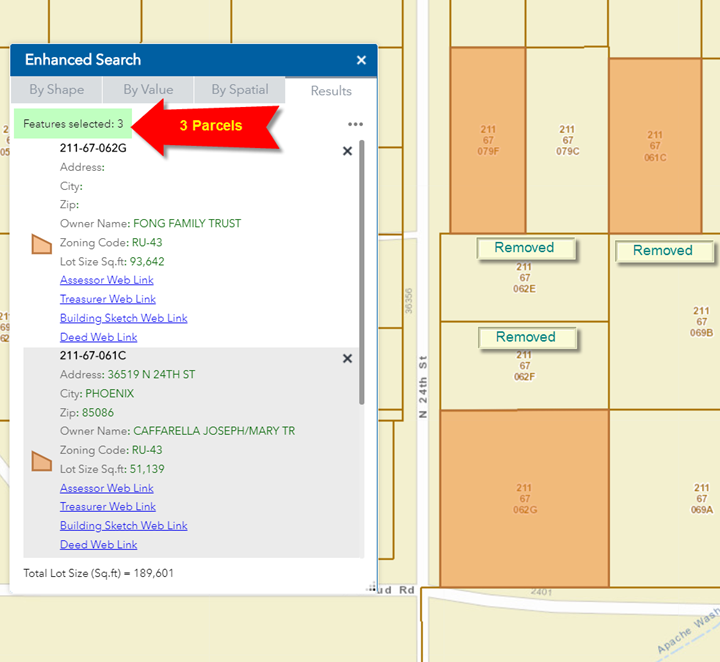
With the Extent Tool engaged, draw a rectangle to intersect three parcels:
Three Parcels are selected.
They are highlighted in orange.
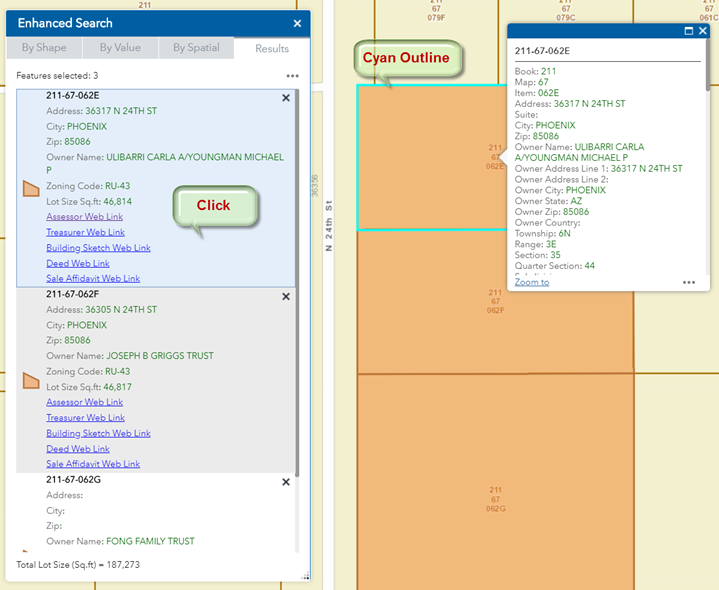
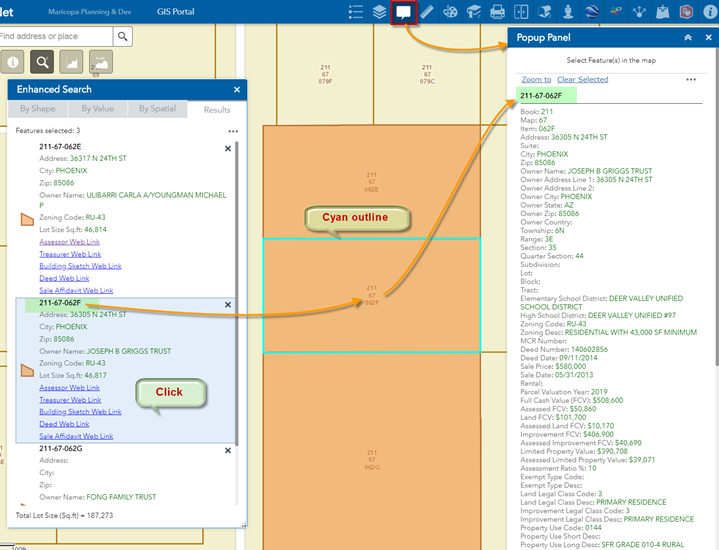
Click on the first result showing Parcel 211-67-062E
The Parcel Boundary is marked with a cyan outline.
Open the Popup Panel Widget.
Click on the second Result showing Parcel 211-67-062F
The corresponding parcel boundary is marked with a cyan outline.
The Parcel attributes for 211-67-062F are shown in the Popup Panel.
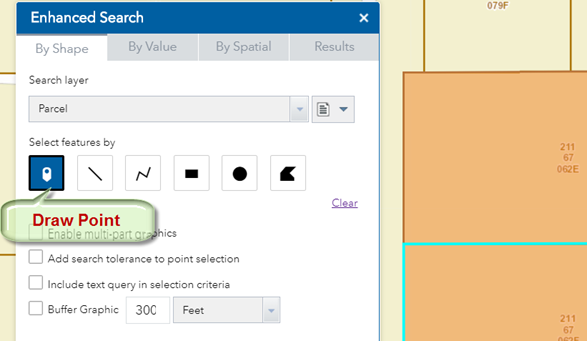
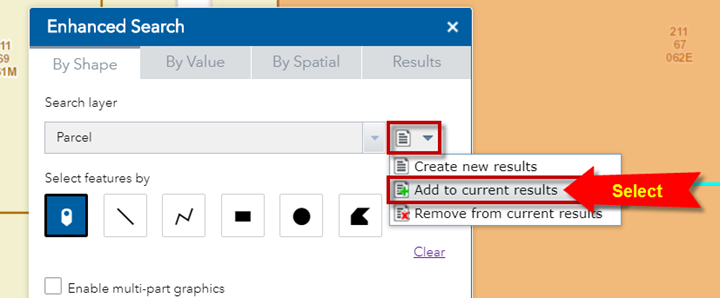
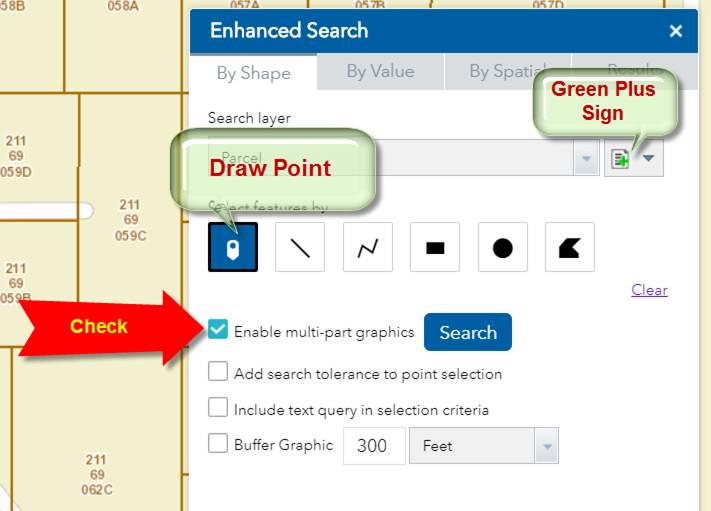
Switch to the Draw Point Tool
From the Selection Mode drop down, select Add to current results.
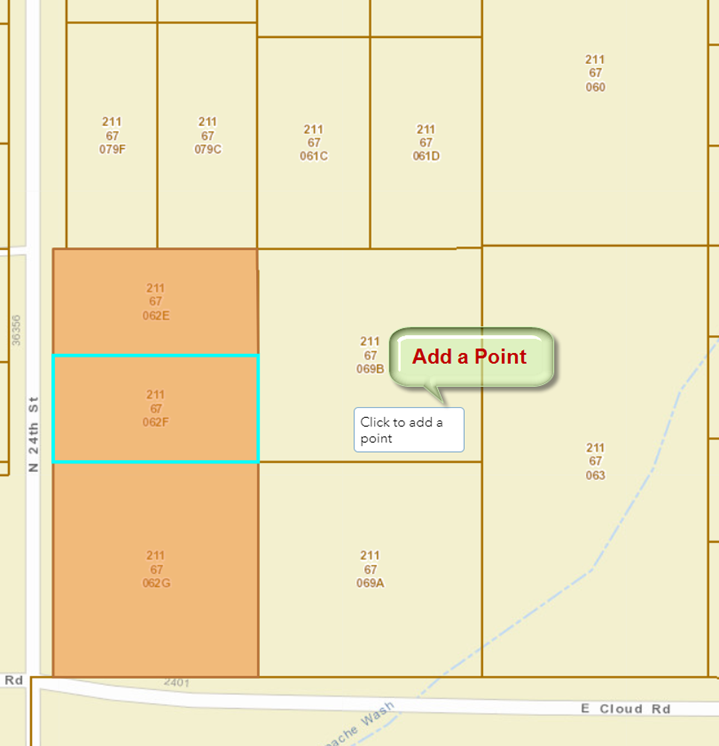
Click on an unselected parcel.
Now you have 4 Parcels selected.
You can select multiple parcels at a time.
Open the By Shape Tab.
Notice the Green Plus Sign on the Selection Mode Icon.
This means you will be adding to the selection.
Engage the Draw Point Tool.
Check the Enable multi-part graphics option.
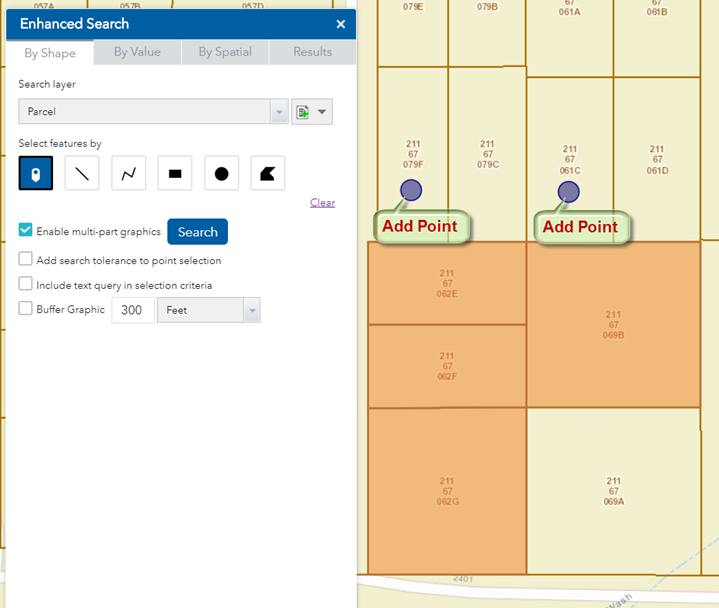
Add two points to select two more parcels.
They are drawn with large purple dots.
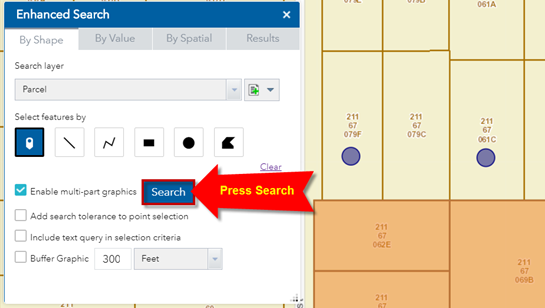
Press Search
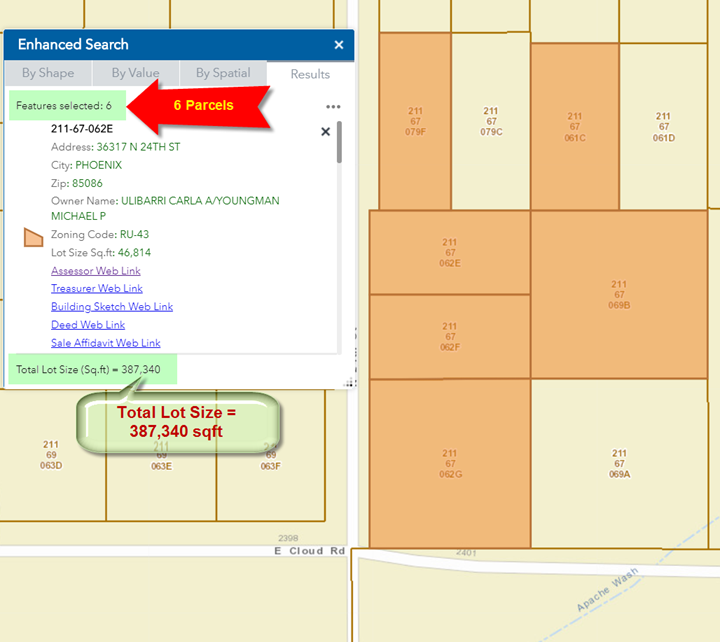
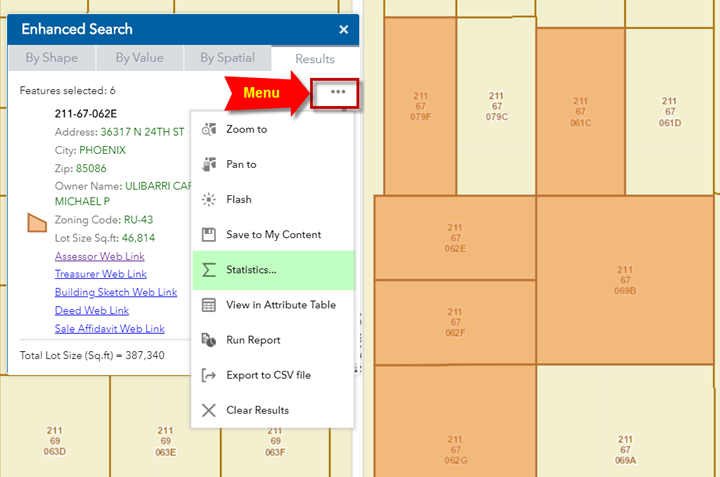
Now you have 6 Parcels selected.
The Total Lot Size of these 6 selected parcels = 387,340 sqft.
You can quickly view some statistics on these 6 parcels.
Expand the Menu and select Statistics.
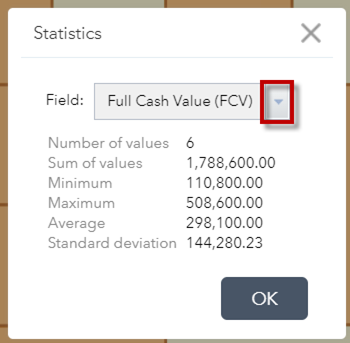
A window will popup showing the summary statistics:
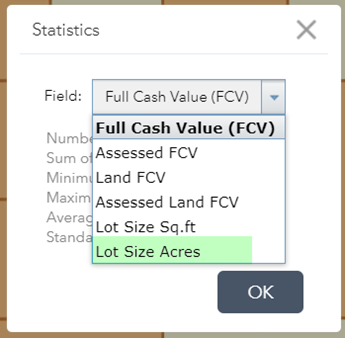
Click on the down arrow to view the summary statistics of other variables.
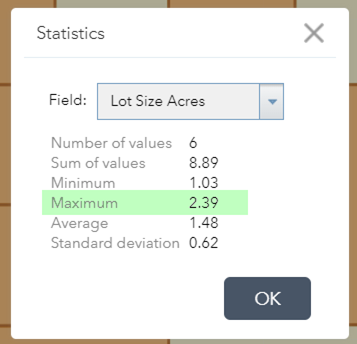
Within the 6 selected parcels, the largest one has a lot size of 2.39 acres.
OK
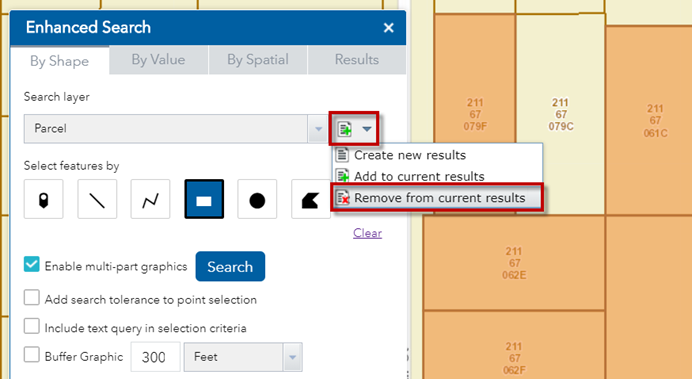
You can remove features from your current selection.
Open the By Shape Tab.
From the Selection Mode dropdown, select Remove from current results.
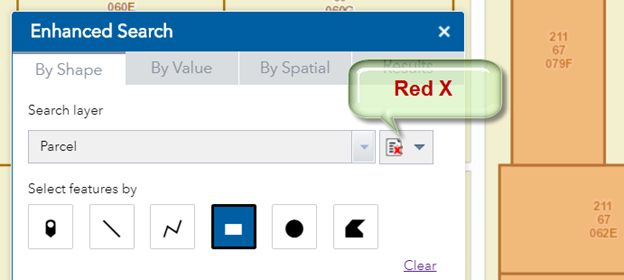
Notice, the red X on the Selection Mode Icon.
You are ready to remove features from the current selection.
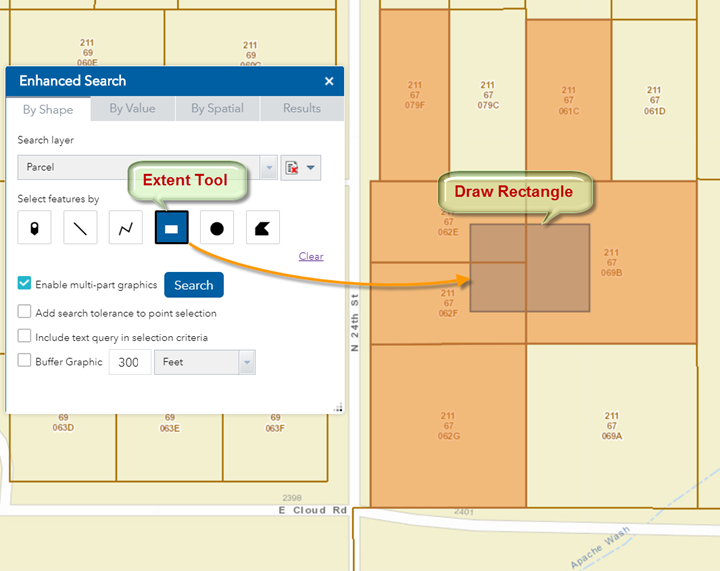
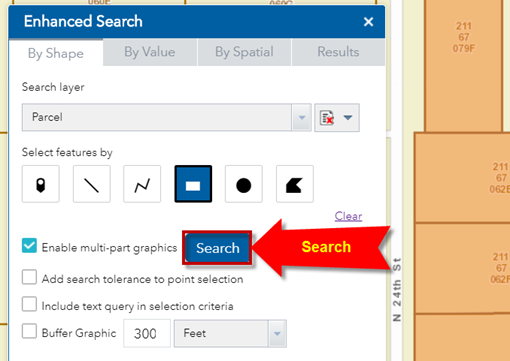
With the Extent Tool engaged, draw a rectangle to select 3 parcels.
Press Search
These 3 parcels are now removed from your original 6.
You are left with the remaining 3 parcels.
Interactive selection of features is a powerful tool. It always yields 100% correct results.
Selection by value is not reliable in cases where you have incomplete or incorrect data.
Next, you will learn how to select features by adding a buffer to the shapes you draw.
Imagine this scenario.
A water main has broken on a street. You want to find all parcels within 300 feet and notify the owners. How would you do that?
Clear the current selection.
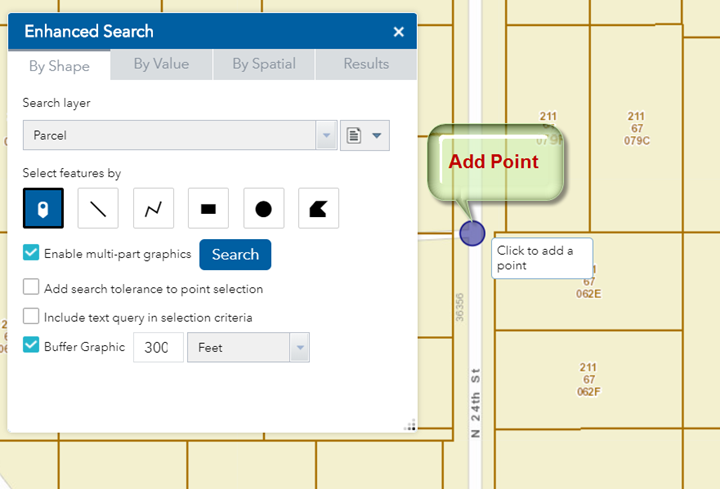
Select the Draw Point Tool.
Check the Buffer Graphic option.
The default buffer distance is 300 ft.
Add a point on the street where the water main has broken.
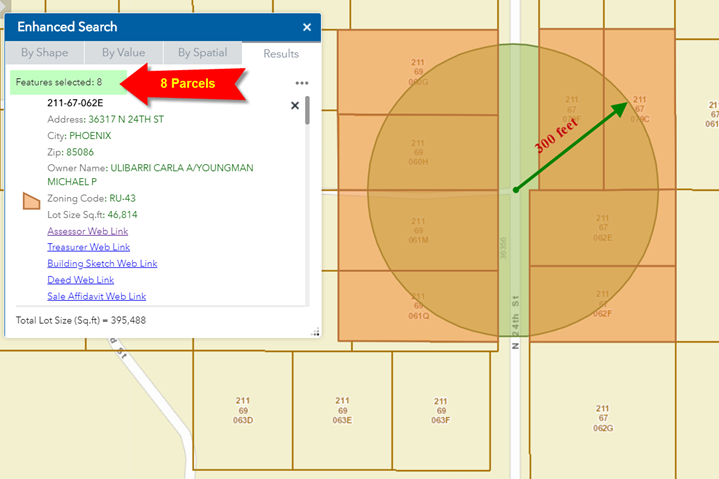
Press Search
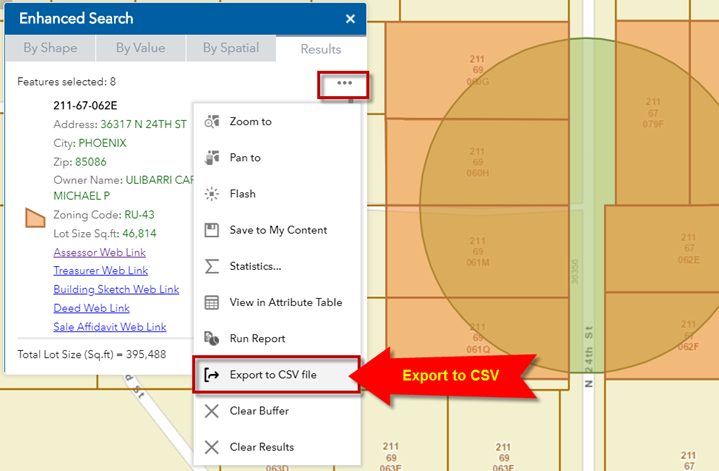
There are 8 Parcels within 300 feet of your water main.
Export the selected results to a CSV file.
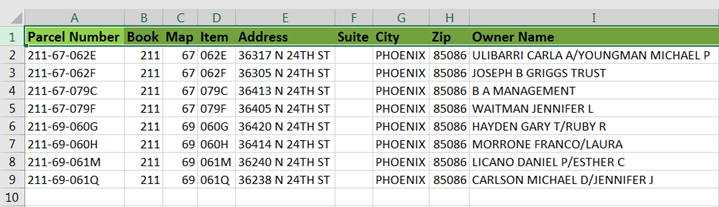
View the CSV file in Excel.
These are the names and addresses of the owners.
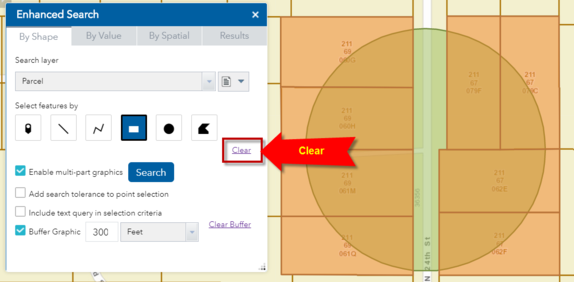
Clear the selection.
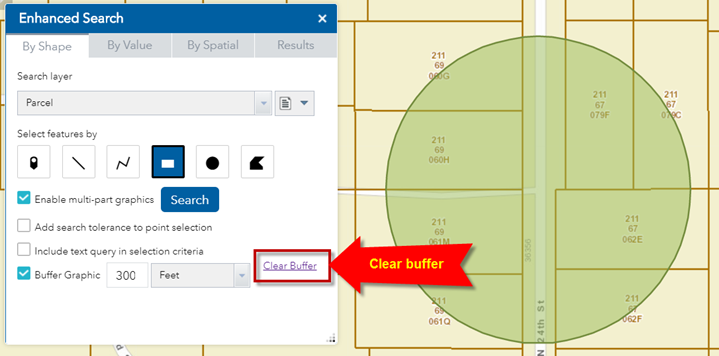
Clear the buffer.
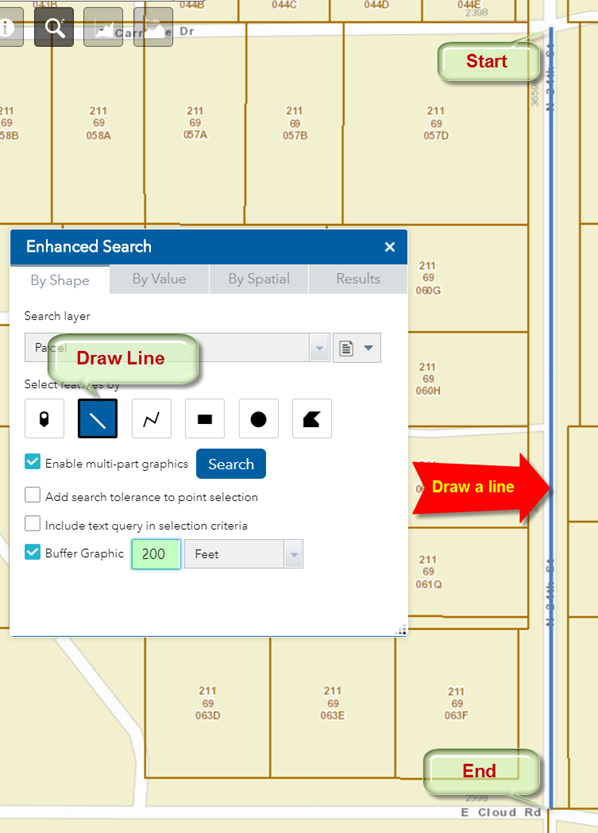
You can draw a line along a street segment and find all the parcels within 200 feet of each side of the street.
Engage the Draw Line Tool. Set the buffer distance to 200 feet.
Draw a line segment along the centerline of a street.
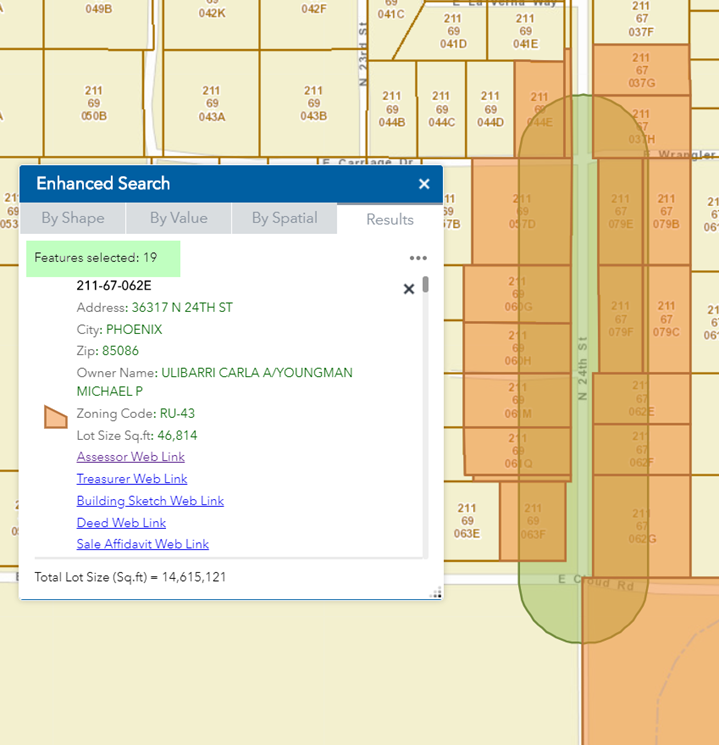
Press Search
Now you can see all the parcels that lie within 200 feet of this street segment.
This analysis can come in handy if this street needs to be closed for construction.
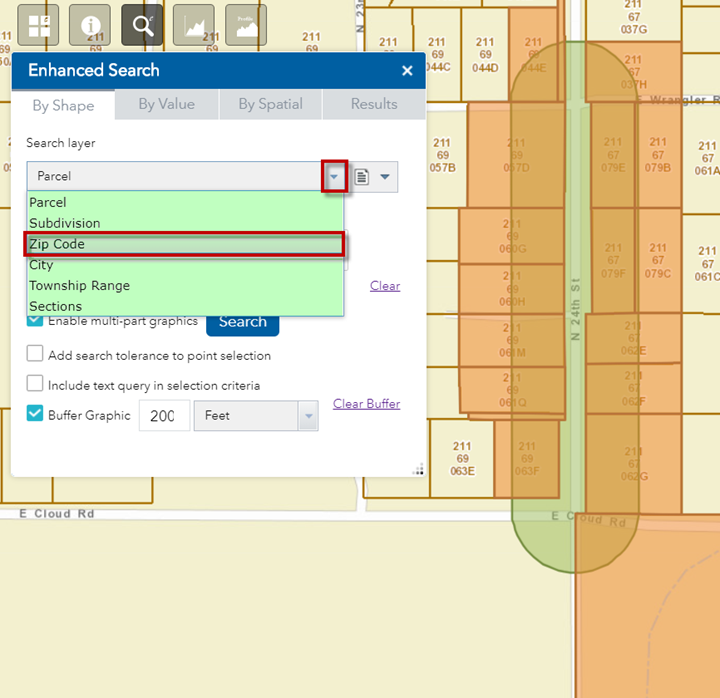
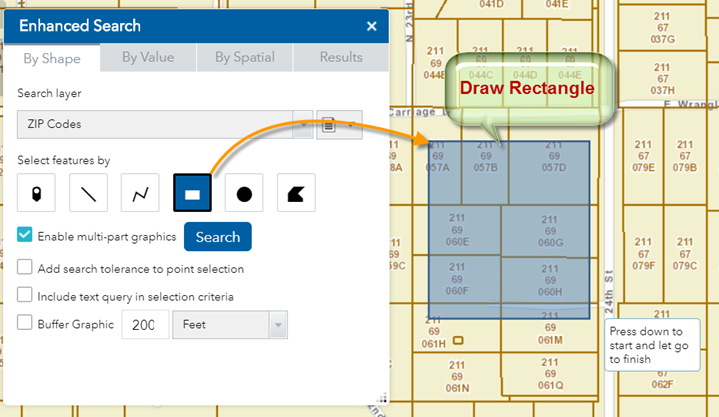
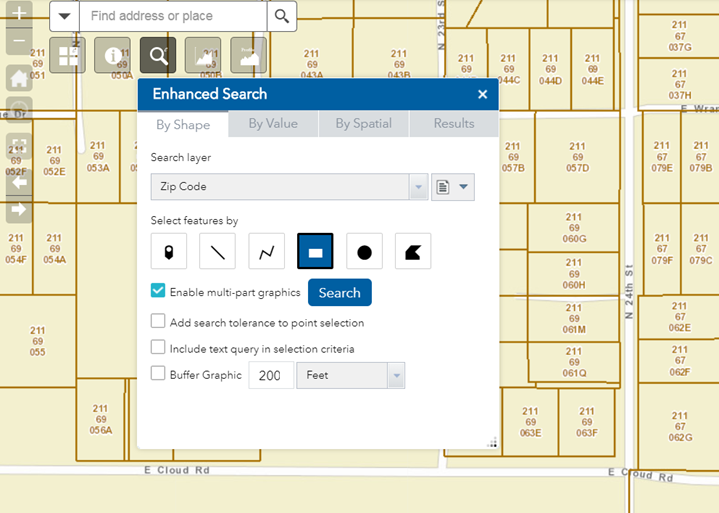
You can search for all the Layers in this Web App by shape.
Click on the down arrow to view the list of layers.
Select Zip Code
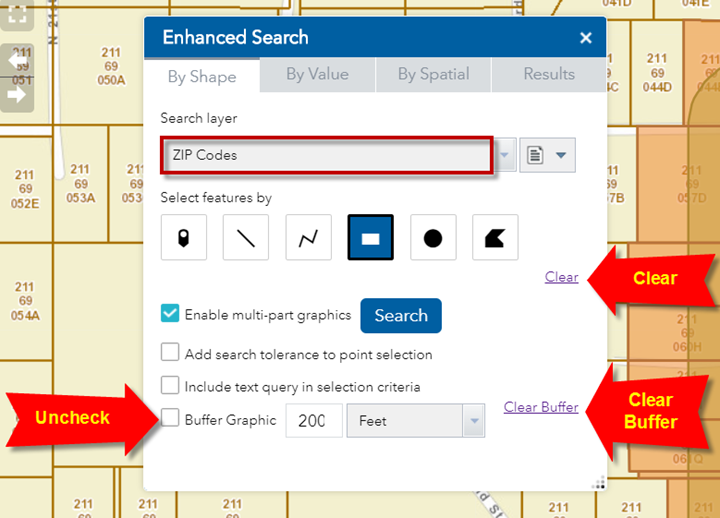
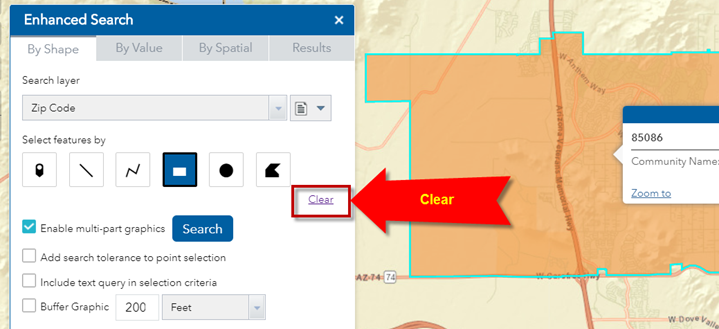
Clear the Selection
Clear the Buffer
Uncheck the Buffer Graphic option.
Make sure your Search Layer = ZIP Codes
With the Draw Extent Tool engaged, draw a rectangle on the map.
Press Search.
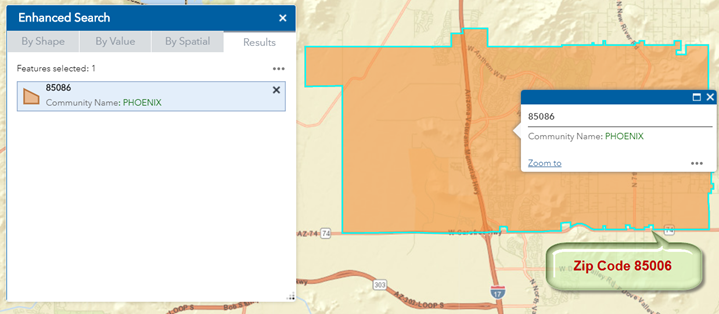
The area defined by your rectangle falls within Zip Code 85086.
The selected Zip Code is highlighted in orange.
You can use this simple trick to define your study area and locate all the Layers that intersect it.
Open the By Shape Tab
Clear the selection
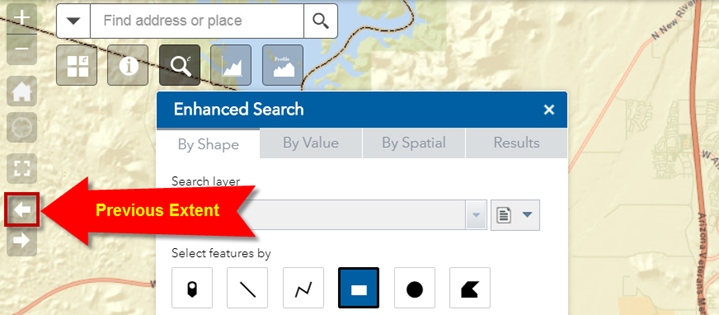
Go back to your previous extent.
You would need to click on the Previous Extent tool several times to get back to where you can see the Parcels.
Notice, you cannot Pan the map while any of the drawing tools are active!
So how would you Pan the map if you needed to?